Classful Vs Classless Addressing Subnet and CIDR <<
Previous Next >> U14
Windows Networking Windows網絡
Windows networking is nearly identical in all aspects from Vista through to Windows 10. To access the network settings, go to either the control panel, then “network and Internet,” then “network and sharing center,” or right-click the “open network and sharing center” icon in the system tray (next to the clock).
從Vista到Windows 10,Windows聯網在各個方面都幾乎相同。要訪問網絡設置,請轉到控制面板,然後依次單擊“網絡和Internet”,“網絡和共享中心”,或右鍵單擊“打開”。 網絡和共享中心”圖標(位於時鐘旁邊)。

Accessing the network and sharing center from the system tray. Image used under CC-BY license from Russell Burchill.
Select (1) Ethernet, then (2) properties, then (3) TCP/IPv4.
選擇(1)以太網,然後選擇(2)屬性,然後選擇(3)TCP / IPv4。
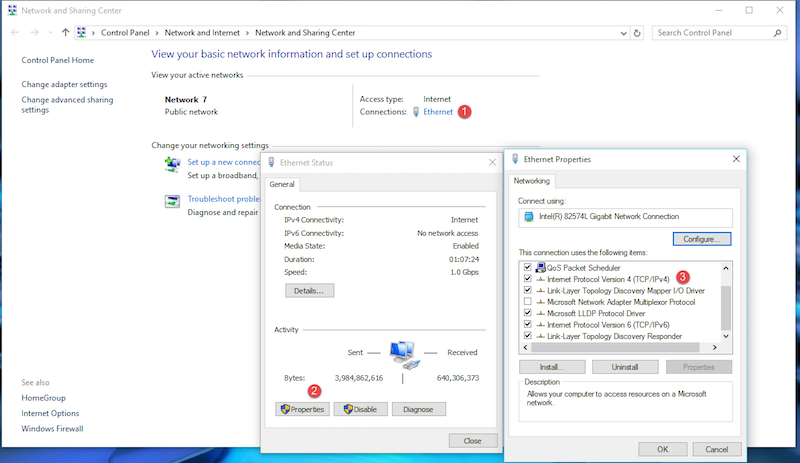
The Ethernet properties window of a particular network. Image used under CC-BY license from Russell Burchill.
Remember, a technician will ensure settings fit the current network. Most networks are set up with DHCP, which will provide the workstation with an IP address, gateway, and DNS server address.
Double-click the IPv4 properties dialogue box and set both radio buttons to “obtain (an IP address/DNS server address) automatically.” The window on the right in the image below allows for the APIPA address to be automatically assigned or for the user to configure a static IPv4 address.
請記住,技術人員將確保設置適合當前網絡。 大多數網絡都設置有DHCP,它將為工作站提供IP地址,網關和DNS服務器地址。
雙擊“ IPv4屬性”對話框,並將兩個單選按鈕設置為“自動獲取(IP地址/ DNS服務器地址)”。 下圖右側的窗口允許自動分配APIPA地址或允許用戶配置靜態IPv4地址。
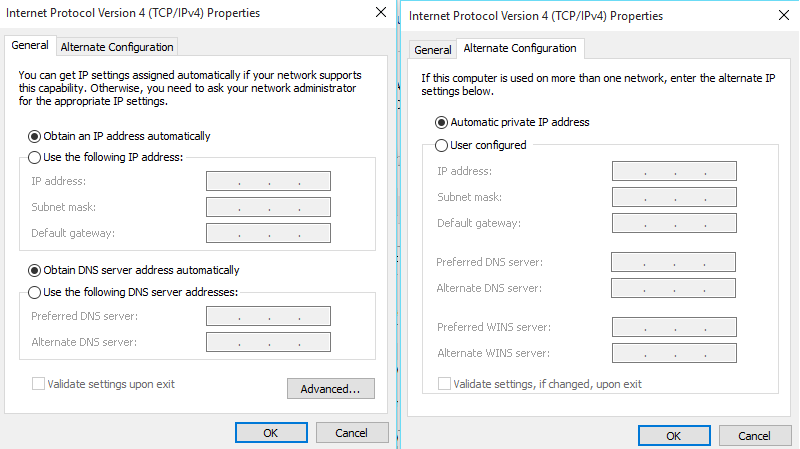
TCP/IPv4 properties windows. Image used under CC-BY license from Russell Burchill.
Classful Vs Classless Addressing Subnet and CIDR <<
Previous Next >> U14